2.3K
In this next example we will connect multiple LEDs to our Arduino and create an effect called the Knight rider effect (after the TV show) or the Larsson effect (named after the creator of the TV show Battlestar Galactica).
In our example of creating a knight rider effect with some LEDs you will require the following parts.
| Amount | Part Type | Properties |
|---|---|---|
| 8 | Red (633nm) LED | package 3 mm [THT]; leg yes; color Red (633nm) |
| 1 | Arduino Uno (Rev3) | type Arduino UNO (Rev3) |
| 8 | 1kΩ Resistor | package THT; tolerance ±5%; resistance 1kΩ; pin spacing 400 mil; bands 4 |
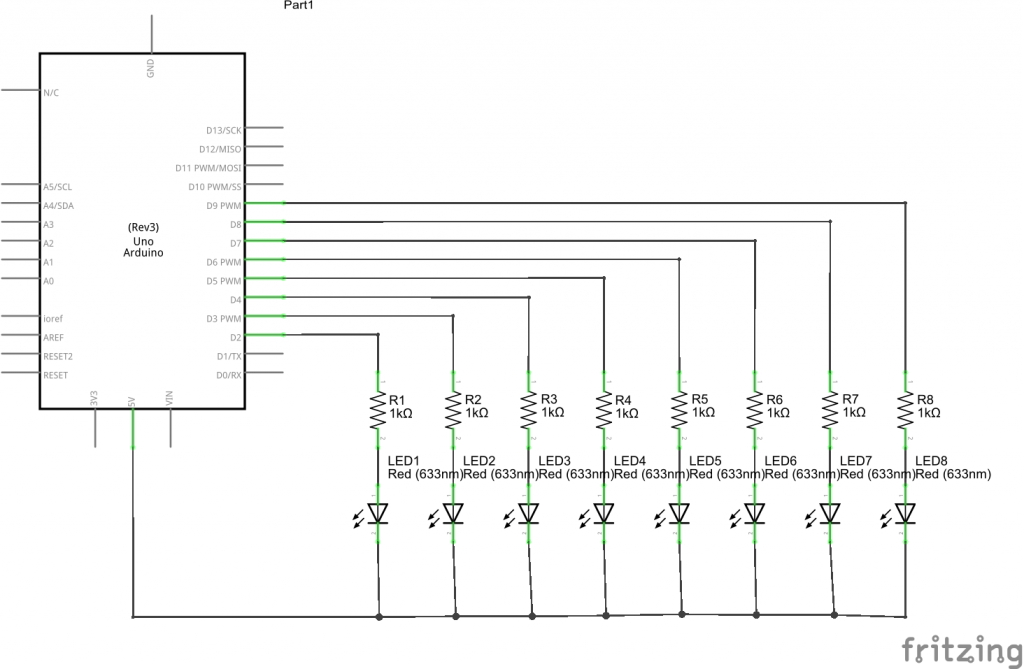
Now build the circuit as follows, as you can see we connect our resistor and LEDs between D2 and D9
knight rider example
Code
[codesyntax lang=”cpp”]
int pinArray[] = {2, 3, 4, 5, 6, 7,8,9};
int count = 0;
int timer = 100;

void setup()
{
for (count=0;count<8;count++)
{
pinMode(pinArray[count], OUTPUT);
}
}

void loop()
{
for (count=0;count<8;count++)
{
digitalWrite(pinArray[count], HIGH);
delay(timer);
digitalWrite(pinArray[count], LOW);
delay(timer);
}
for (count=7;count>=0;count--)
{
digitalWrite(pinArray[count], HIGH);
delay(timer);
digitalWrite(pinArray[count], LOW);
delay(timer);
}
}
[/codesyntax]