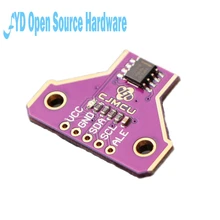
In this example we will display temperature readings from a TMP175 sensor on a Nokia LCD4884 shield
The TMP75 and TMP175 devices are digital temperature sensors ideal for NTC and PTC thermistor replacement. The devices offer a typical accuracy of ±1°C without requiring calibration or external component signal conditioning. IC temperature sensors are highly linear and do not require complex calculations or look-up tables to derive the temperature. The on-chip 12-bit ADC offers resolutions down to 0.0625°C. The devices are available in the industry standard LM75 SOIC-8 and MSOP-8 footprint.
The TMP175 and TMP75 feature SMBus, Two-Wire, and I2C interface compatibility. The TMP175 device allows up to 27 devices on one bus. The TMP75 allows up to eight 8 on one bus. The TMP175 and TMP75 both feature an SMBus Alert function.
The TMP175 and TMP75 devices are ideal for extended temperature measurement in a variety of communication, computer, consumer, environmental, industrial, and instrumentation applications.
Features
- TMP175: 27 Addresses
- TMP75: 8 Addresses, NIST Traceable
- Digital Output: SMBus™, Two-Wire™, and I2C
Interface Compatibility - Resolution: 9 to 12 Bits, User-Selectable
- Accuracy:
- ±1°C (Typical) from –40°C to 125°C
- ±2°C (Maximum) from –40°C to 125°C
- Low Quiescent Current: 50-µA, 0.1-µA Standby
- Wide Supply Range: 2.7 V to 5.5 V
- Small 8-Pin MSOP and 8-Pin SOIC Packages
Parts List
A slightly different LCD4884 in the product link, about $20 for all of these parts
Connection
I didn’t have fritzing parts but hopefully this image will show you the connection

lcd4884 and TMP175
Code
You will need to add the Adafruit PCD8544 library in the Arduino IDE
This is for the Sainsmart and DFRobot LCD4884 shield, you may have to change this
Adafruit_PCD8544 display = Adafruit_PCD8544(2, 3, 4, 5, 6); //dfrobot lcd4884 shield
[codesyntax lang=”cpp”]
#include <SPI.h>
#include <Adafruit_GFX.h>
#include <Adafruit_PCD8544.h>
#include <Wire.h>


// Software SPI (slower updates, more flexible pin options):
// pin 7 - Serial clock out (SCLK)
// pin 6 - Serial data out (DIN)
// pin 5 - Data/Command select (D/C)
// pin 4 - LCD chip select (CS)
// pin 3 - LCD reset (RST)
Adafruit_PCD8544 display = Adafruit_PCD8544(2, 3, 4, 5, 6); //dfrobot lcd4884 shield

#define XPOS 0
#define YPOS 1
#define DELTAY 2

byte TempHi;              // Variable hold data high byte
byte TempLo;              // Variable hold data low byte
boolean P_N;              // Bit flag for Positive and Negative
unsigned int Decimal;     // Variable hold decimal value

void Cal_Temp();


void setup()   {
  Serial.begin(9600);
  Wire.begin();             // join i2c bus (address optional for master)
  display.begin();
  // init done

  // you can change the contrast around to adapt the display
  // for the best viewing!
  display.setContrast(50);
  display.clearDisplay();   // clears the screen and buffer
  // text display tests
  display.setTextSize(1);
  display.setTextColor(BLACK);
  display.setCursor(0,0);
  display.setTextColor(WHITE, BLACK); // 'inverted' text
  display.println("LM175 TEST");
  display.display();
  delay(1000);

}


void loop()
{
  const int I2C_address = 0x37;  // I2C write address

  delay(100);
  Wire.beginTransmission(I2C_address);
  Wire.write(1);             // Setup configuration register
  Wire.write(0x60);          // 12-bit
  Wire.endTransmission();

  Wire.beginTransmission(I2C_address);
  Wire.write(0);             // Setup Pointer Register to 0
  Wire.endTransmission();

  while (1)
  {
    delay(1000);

    // Read temperature value
    Wire.requestFrom(I2C_address, 2);
    while(Wire.available())          // Checkf for data from slave
    {
      TempHi = Wire.read();       // Read temperature high byte
      TempLo = Wire.read();       // Read temperature low byte
    }
    Cal_Temp ();

    // Display temperature
    display.setTextColor(BLACK, WHITE); // 'inverted' text
    display.setCursor(0,15);
    display.print(TempHi,DEC);
    display.print(".");
    display.print(Decimal,DEC);
    display.println(" C");
    display.display();
  }
}

void Cal_Temp()
{
  if (TempHi&0x80)          // If bit7 of the TempHi is HIGH then the temperature is negative
    P_N = 0;
  else                      // Else the temperature is positive
    P_N = 1;

  TempHi = TempHi & 0x7F;   // Remove sign
  TempLo = TempLo & 0xF0;   // Filter out last nibble
  TempLo = TempLo >>4;      // Shift right 4 times
  Decimal = TempLo;
  Decimal = Decimal * 625;  // Each bit = 0.0625 degree C

}
[/codesyntax]
Links
TMP175 on PCD8544 code