The most basic project that you can start with is the capability to flash an LED, this is the common ‘hello world’ type of program you can write and run on your arduino.
Most Arduino’s have an LED attached to D13, you are free to use this option especially if you do not have any components such as an LED but we will attach an LED externally to the Arduino, if you wish to flash the LED on the board skip to the code and then change the led value as explained at the end of the article
Parts List
Here are the parts you will require for this project
1 Arduino UNO or equivalent and cable
1 LED
1 470 ohm resistor
1 Breadboard to build the circuit
Wires to connect the LED resistor to the Arduino
Here is what you will build, watch the polarity of the LED, the image below shows how to tell the positive (anode) and negative (cathode) apart.
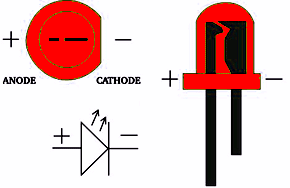
LED polarity image
As you can see the cathode is connected to the GND on the Arduino.
Breadboard and Schematic layout
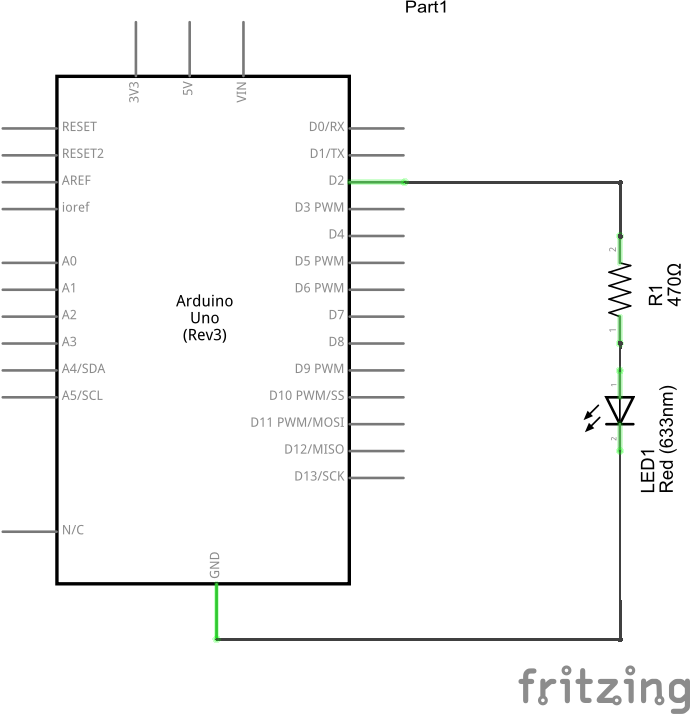
arduino led schematic
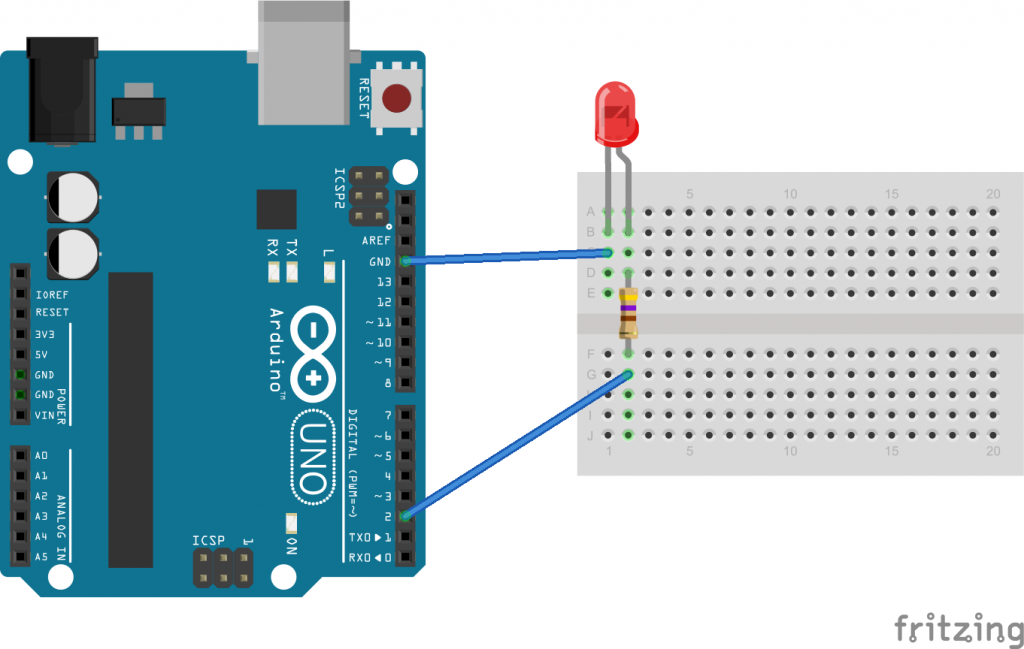
led arduino breadboard layout
Here is the schematic, fairly straightforward
We will toggle the appropriate Arduino output pin high to switch the LED on, to switch it off we will toggle the output low.
Code
Here is the code, if you want to use the on board LED of the Arduino Uno you would change this to int ledPin = 13
[codesyntax lang=”cpp”]
int ledPin = 2; // we will use this variable later

// The setup() method runs once at startup
void setup()
{
pinMode(ledPin, OUTPUT); // Set pin as OUTPUT
}

// the loop() method repeats indefinitely
void loop()
{
digitalWrite(ledPin, HIGH);
delay(1000); //delay for 100 ms
digitalWrite(ledPin, LOW);
delay(1000);
}
[/codesyntax]